
When you’re printing flexible packaging bags—like stand-up pouches, zip-lock bags, or vacuum bags—it’s not just about making them look pretty. It’s about making sure they work.
You could have the coolest design in the world, but if your text prints blurry, your colors look off, or your logo ends up half-sealed in a zipper—you’ve got a problem.
At DINGLI PACK, we’ve seen it all. That’s why we created this simple pre-print checklist just for you—especially helpful if you're new to custom printed bags or working with overseas manufacturers.
1. Add a 3mm Bleed – It’s Like a Safety Buffer
Think of your design as a pizza. If you want the toppings to reach the edge after slicing, you have to let them slightly overflow in the oven.
Same goes for packaging. You need a 3mm “bleed area” around the design, so when the bag is cut and sealed, your artwork doesn’t accidentally stop short.
Also: make sure your artwork is 300 DPI resolution, so it doesn’t look pixelated when printed.
2. Use CMYK, Not RGB – Because Ink and Screens Don’t Speak the Same Language
RGB is great for screens (phones, laptops), but printing machines use CMYK color mode—cyan, magenta, yellow, black.
If you send a file in RGB, your red apple might turn orange when printed. Not fun.
�� Pro tip: If your brand uses specific Pantone colors, include those values for spot-color accuracy.
3. Mind Your Blacks – Not All Black Is Equal
For small text or barcodes, always use 100% K black only (C:0 M:0 Y:0 K:100). It prints sharper and cleaner.
For big black backgrounds? Go for rich black like (C:40 M:30 Y:30 K:100) to make it look deep and solid.
Also, round your CMYK numbers to clean values (like 5, 10, 15). Trust us—your printer will thank you.
4. Embed Images and Keep Transparency Above 10%
Ever sent a file that looked great on screen… and then parts just vanished in the print? That’s often because of:
Linked images (not embedded) that go missing
Super low transparency (under 10%) that doesn't print well
Keep things simple:
✔️ Embed all images
✔️ Don’t use ultra-light transparent layers unless you're sure they'll show up
5. Turn Text into Outlines
When you're done designing, convert all your fonts to outlines.
Why? It’s like baking a cookie with a cutter: once it’s shaped, it won’t change, even if you send it to someone else’s oven (or printer).
This way, your text won’t suddenly switch fonts or spacing on the printer’s side.
6. Keep Text Above 6pt, Lines Thicker than 0.25pt
Flexible packaging is...well, flexible. Your beautiful pouch will be squeezed, sealed, folded, and sometimes frozen.
So tiny text or ultra-thin lines? They’ll get lost.
Stick to:
✔️ Font size: 6pt or larger
✔️ Line thickness: 0.25pt or more
Especially avoid putting small text near heat seals or zippers!
7. Proofread for Legal and Brand Accuracy
Check your file like your brand’s reputation depends on it—because it does.
Things to double-check:
Spelling and grammar
Barcode placement and scanability
Font licensing (yes, some fonts need commercial use rights)
Logos and icons (do you have permission to use them?)
�� Tip: Print a paper version and scan the barcode to test it.
8. Save as PDF With Bleed & Print Marks – Lock It Down
When your file is ready, export it as a PDF/X format with:
All fonts outlined
3mm bleed included
Crop/trim marks visible
CMYK color mode selected
Why PDF? It’s like sending a locked version of your design. No unexpected shifts, missing images, or broken fonts.
9. Label Everything – Help Your Printer Help You
Printers aren’t mind readers. To avoid delays or mistakes, always label your file or email with:
Bag size (e.g. 6” x 9” stand-up pouch with zipper)
Material layers (e.g. PET/VMPET/PE)
Coating: matte? gloss? soft-touch?
Print type: single side or both sides?
Color mode: CMYK + any Pantone
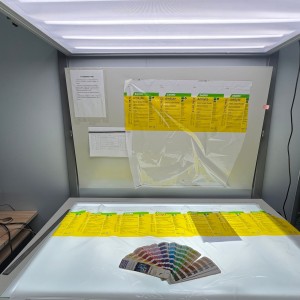
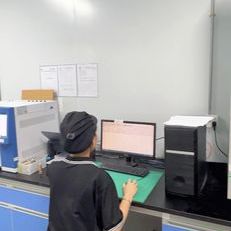
10. Ask for a Sample – It’s Like a Dress Rehearsal
Before mass printing thousands of bags, ask for a digital proof or physical sample. It may not be the final material, but it will show layout, sizing, and most colors. At DINGLI PACK, we provide free samples so you can preview your packaging with zero risk. And every order goes through three rounds of quality checks—from pre-print inspection, to printing accuracy, to final packing—so what you see is truly what you get.
Note: Some colors may shift slightly once laminated or applied to shiny film, but you'll still catch 95% of issues in this step.

Final Thought: You Need Packaging That Works as Hard as You Do
Don’t let small file errors turn into big, expensive headaches.
By prepping your artwork carefully, you’re setting up your packaging—and your brand—for success.
At DINGLI PACK, we offer free file reviews, expert print guidance, and packaging that’s built to perform. Whether you're new to custom bags or scaling up production, we’ve got your back.
�� Got a file ready? Or need help getting started?
[Talk to our print experts here] – we’ll walk you through it, step by step.


Post time: May-06-2025